Friday, November 30, 2012

First Tasting: 100% Brett C with Citra

So it’s been a really long time since I last posted, but a lot has happened since then. I got a new job and we bought a house. The house is mostly what caused the delay in posting/brewing. I didn’t want to brew anything knowing we were leaving soon. The good news is that in the two months that we’ve been living in the new house I’ve been able to brew twice. I’ll post the details on those adventures later. Right now I’m going to try to catch up on some tastings.

Last hurrah 100% Brett

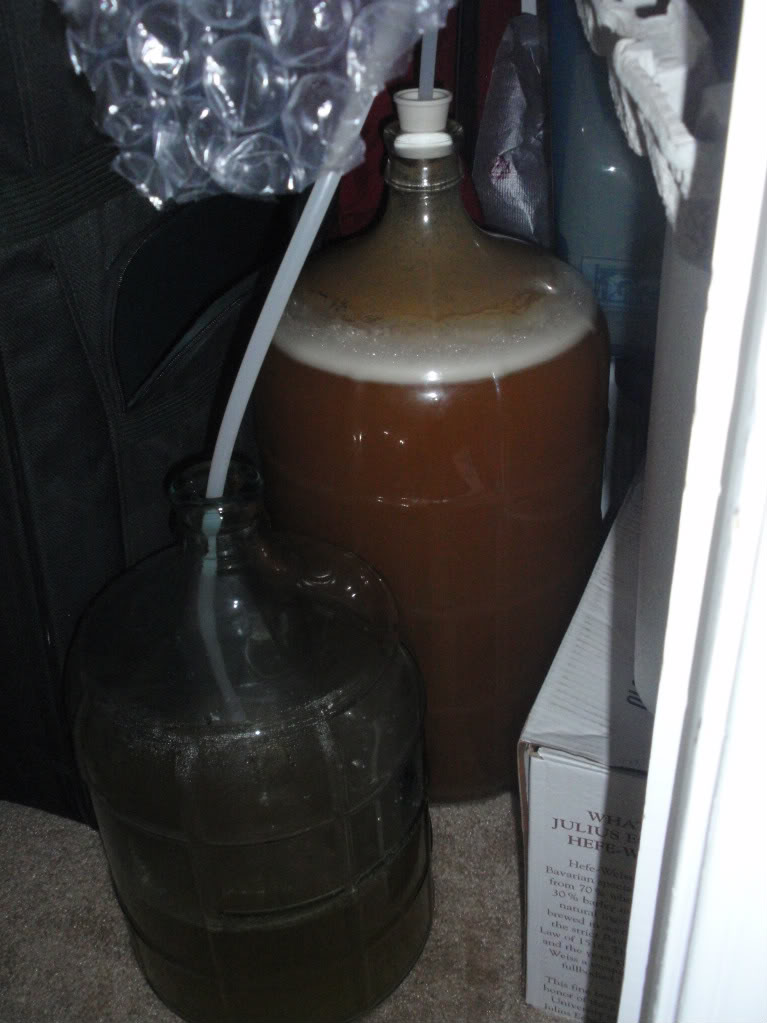
You might remember this as my experimental beer. I brewed one batch using a slightly tweaked version of my saison recipe. Then I split the batch to lower the OG (which I forgot to read). One carboy I aerated and the other I didn’t. I had read that Brett in the presence of oxygen will create acidic acid, so I figured I would see if it was noticeable or not. There are some factors that might have ruined this experiment. For one I can’t control how much the beer is aerated, secondly both beers might have received enough oxygen to create acidic acid when I was racking them into the carboys and dryhopping them, third I’m not sure what the threshold for acidic acid productions is for Brett. The third part of this experiment involved me splitting a gallon off of one of the carboys and adding it to a pound of rhubarb in an attempt to make a quick sour/ tart beer. It’s been a while since I opened the first bottles so my reviews will be based over the time since the first bottle to now.

Aeration comparison

Appearance: Each beer is very clear, probably the clearest beers I have produced to date, and pale yellow. Brett will really clear up. There is a small amount of heat head, about a centimeter thick that leaves some lacing down the sides of the glass.

Aroma: At first the beer was a pineapple guava bomb with a touch of funk, but at this point there is a subtle fruity undertone with much more funk apparent. I honestly probably enjoy the beer more at this point then I did originally.

Taste: The taste can best be described as funky. I’m surprised how much brett is apparent in the flavor of this beer. It dried out a decent amount so there is not much left, only a little residual bready flavor. There was really no discernible difference in the aerated and non-aerated versions of the beer as far as acid production was concerned. They also both finished with around the same FG so I don’t think that was effected that much either.

Mouthfeel: In my opinion it’s slightly undercarbonated. It has become better as time has gone along but originally I was worried about bottle bombs so I didn’t use as much sugar as I should have. Looking back and after further research most people say to use the same priming sugar as you would with a clean yeast strain for 100% brett fermented beers. This was a correction I made for the rhubarb version.

Overall: I really enjoy this beer. This is one of my favorite beers that I have brewed to date. It’s a great summer session beer with a huge nose. I would say that it pretty much turned out exactly as I wanted. I was able to share a bottle with one of the brewers at Jester King Brewery recently and he also really enjoyed the beer, which made me happy (always nice to have approval from a professional). This is definitely a beer that I will brew again for next summer and I will continue to experiment with Brett. I’m thinking my next 100% brett will be a brett brux IPA. 

Thursday, November 29, 2012

Cinnamon Raisin Bagels

This was a recipe I got from the Brown Eyed Baker. I changed it a little bit drying to combine what she learned from her later batch with what she did for the actual cinnamon raisin recipe. It takes a couple of days to make them but they are much different and better from any bagel you would buy from the store, unless you were to buy them fresh from a bakery (soon I’ll be making them better then that too ;)  The key is patience and planning ahead.

The first step is to make a Sponge, if you’ve never made one before its pretty easy and is the same principal as making a yeast starter (which is what it is really, just for bread).
In a bowl mix the following,
  • 1 teaspoon of yeast
  • 4 cups bread flour
  • 2½ cups water (at room temperature)
When finished and fully integrated cover with plastic wrap and let sit for two hours. The sponge should be sticky and similar to a pancake batter. I put mine in the refrigerator and let it rest over night since I was doing this after work during the week. The extra time won’t hurt it at all if you feel to go this route. It will start to bubble and look foamy.

To make the dough mix the rest of the yeast in with the sponge, then add in the first 3 cups of flour, malt, sugar, cinnamon, and salt and continue stirring or mixing with a dough hook. Eventually the dough will thicken and form a ball, at this point add in the last ¾ of a cup of flour to thicken further.

  • 1 teaspoon yeast
  • 3¾ cups bread flour
  • 2¾ teaspoons salt
  • 2 teaspoons malt powder aka extract (or 1 tablespoon dark or light malt syrup, honey or brown sugar)
  • 1 tablespoon of cinnamon
  • 5 table spoons of raw sugar
At this point transfer the dough to a lightly floured surface and knead for an additional 10 minutes. During the last two minutes of kneading add the raisins.
  • 2 cups packed raisins, rinsed in warm water
The dough should be firm and smooth without any raw flour remaining. The dough also should not be sticky or tacky. If you need to you can always add a little more flour.

As soon as you are finished mixing the ingredients divide the dough into roughly 12 pieces and roll them into balls. Cover the balls with a damp towel and let them rest for about 20 minutes. While the dough is rising prepare a two baking sheets with parchment paper and spray with oil. When the second rest has finished take a single roll and press your thumb in the center and start to spread the dough until a hole is formed. Try to keep the rings as even as possible so they bake evenly. The hold should be about 2 to 2.5 inches in diameter. When finished with all of the bagels place them on the pans, spray with oil, cover with plastic wrap and let sit for an additional 20 minutes. Check to see if the bagels are ready to be retarded in the refrigerator by placing one in a bowl of cool water. If the bagel floats within 10 seconds remove it and dry the bagel and they’re ready to be placed in the refrigerator overnight. If the bagels do not float quickly keep them resting for another 20 minutes.

The next day:
Preheat the oven to 500 degrees F and bring a large pot of water to a boil. When the water is boiling add in the baking soda,
  • 1 tablespoon baking soda
  • Cornmeal for dusting
 Slowly drop the bagels into the water, as many that will fit comfortable, then flip them after one minute and boil on the other side for another minute. If you want them to be extra chewy go for two minutes per side, but I was happy with one minute. Sprinkle the parchment paper with cornmeal while you wait and place the bagels on it when they are done. I suggest using a slotted spoon to remove the bagels.

When all of the bagels have been boiled place them in the oven and bake for 5 minutes, then rotate the pans 180 degrees while switching shelves and bake for an additional 5 minutes at 450 degrees. If you prefer them a little darker continue baking.

Remove the bagels from the oven and let them cool on a cooling rack for about 15 minutes. Finally you’re ready to have some delicious bagels. They should keep for about two days but do not store them in a closed container or they will get soggy.

Wednesday, November 28, 2012

First Tasting: Vapor Trails

Vapor trails is named after the Rush album of the same title. I figured that since the style of beer is a Steam Beer, vapor worked well. That and I’m a big Rush nerd. Since the style guidelines are based off of Anchor’s Steam beer almost any deviation brings the beer out of style. I’m fine with that sacrifice since it’s a narrow guideline. I tried to replicate the color and the aroma, for the most part, by using Northern Brewer hops. I did, however, also want more flavors, something a little more robust. For that I changed the grist by adding some more toasty malt. I’ve very pleased with how this beer turned out and I’d say so far it’s the closest I’ve some to replicating commercial characteristics. I poured an Anchor Steam to do a little side by side comparison. The differences were noticeable, but not in a bad way. Their beer was clearer, but they have the advantage of a filter I assume and cold crashing. I have to leave yeast in the bottle. The other noticeable difference is the freshness and the toasty flavor that I added. I was also slightly surprised to find their beer to be dryer then mine, considering the FG that I got I was expecting it to be too dry.

Appearance: Pours a clear, slightly hazy, deep orange-amber with an off white heat with tightly packet bubbles about two fingers thick. Probably the clearest beer I’ve brewed to date, lager yeast can do wonders for appearance.

Aroma: Very floral and earthy from the Northern Brewer hops with a toasty caramel background.

Flavor: Toasty biscuit, caramel, and earthy notes. Slightly more bitter then Anchor’s version and definitely more robust.

Mouthfeel: Medium body and medium carbonation, the body is where I like it but more than Anchor’s version, but the carbonation is perfect.

Overall:  I really like this beer. I brewed it for my fiancĂ©e because it’s her favorite beer, but I like it too much and need to stop drinking them. Definitely something I would brew again. I might tweak the malt bill a little bit, other than that I like everything about it. The beer is a great spring beer and it would also make a great fall beer.

Tuesday, November 27, 2012

100% Brett Experimentation

I wanted to brew something that was light and refreshing for the summer, but I wanted it to also be complex. My original thought was to brew a saison with Brett, a la, Boulevard Saison-Brett. The only problem it was April and in Texas that means it’s almost summer so I don’t have enough time to wait on the brett. After some research, mostly reading Chad Yakobson’s (head brewer for Crooked Stave) master thesis on Brettanomyces, I decided to do my first 100% brett fermentation. I want something that is fruity and slightly tart or acidic.

I’m using my grain bill from the saison I brewed last year with slight modifications. Instead of candi sugar I’m using acidulated malt and instead of being a 6 gallon batch I’m brewing a 10 gallon batch (since I want it to be a low gravity beer, perfect for hot summer days). I’m hoping that the acid malt will add a slight tartness to the beer. According to Chad he has observed a somewhat symbiotic relationship between Brett and acid. He also mentioned that Brett (at least Brett-C) will produce acidic acid when in the presence of oxygen. To test this I decided to split the batch into two 5 gallon carboys and aerate one but not the other. I also decided not to go with the same hops as I used in my saison but rather to go with New Zealand Motueka hops, which are said to provide a citrus, fruity, aroma and flavor. To really accentuate the citrus feeling I’m going to dry hop it with Citra hops, since I couldn’t pass up buying half a pound the other day. To match with the Citra hops I went with the Brett-C strain, which is known for its fruity aromas produced, such as pineapple and hints of citrus.

The brew day was pretty straight forward; I finally think I’ve fixed my leaky mash tun. As for the Brett-C I made a starter about two weeks in advance since Brett takes a while to get started. According to Chad he believes its best to get the Brett acclimated to an alcoholic environment. I also used White Labs Brett-C which is known to be a small cell count in the test tube. They say it is because Brett is normally pitched in secondary and does not need as high of a cell count, which is true, unless you are using it as the primary strain. After a week of fermenting I decanted and topped up with more wort at a slightly higher gravity.

Recipe
  • Batch size: 10 Gallons
  • Est OG: 1.041
  • Est FG: 1.010
  • Actual FG: 1.007
  • IBU: 16.3
  • SRM: 5
  • ABV: ??
  • Boil time: 75 minutes
  • Efficiency: ?? (est. 65%)
Grain Bill
  • 57% - Two-Row Pils – 10.5lb
  • 19% - Acidulated Malt - 3b 8oz
  • 10% - Two-Row Pale – 1lb 12oz
  • 6% - Flaked Oats – 1lb
  • 4% - Wheat Malt - 12oz
  • 4% - Caramunich I  - 12oz
Hops
  • 1.0 oz – Motueka (pellet) -60 minutes
  • 0.5 oz - Motueka (pellet) - 15 minutes
  • 0.5 oz - Motueka (pellet) - 15 minutes (Post-boil)
  • 3.0 oz – Citra (leaf) – 10 Days (dry-hop)
Yeast
  • WLP645 Brettanomyces claussenii

Mash Schedule
60 minute Saccharification Rest at 157F (the acid malt was added in during the last 15 minutes)

Notes:

(4/28/12) – Brewed by myself. Easy brew day except for the fact that we were having a party later that night so I was also cleaning and attempting to make pretzels while brewing. Chilled to 80F, aerated one carboy, pitch the yeast into each carboy. I forgot to take a gravity measurement so I’m not really sure if they were at my target or if they were the same. I’m assuming that the OGs are not the same since they are two different volumes and I added different amounts of water.

(4/29/12) – Fermentation took off with about an inch thick layer of krausen in each carboy. The non aerated version was white with large bubbles, whereas the aerated version was a darker shade with smaller bubbles and what appeared to be hop particles suspended on top.

(5/15/12) – The krausen has disappeared and the fermentation has slowed. There is an occasional bubble from each air lock, but for the most part silence.

(5/31/12) - Added about one ounce of whole leaf citra hops to each carboy.

(6/7/12) - Added about another ounce of whole leaf citra hops to each carboy.

(6/10/12) - Racked part of the aerated beer into a gallon growler on thawed frozen rhubarb. I used half a pound of frozen pre-sliced rhubarb. The rhubarb was not sanitized. I accidentally spilled some on the floor in the process and it smelled amazing. Fresh tropical fruit abound. I also poured some into a glass for a taste test and was surprised by the tartness that was there. Maybe the aeration worked, it will be interesting to compare to the non aerated version.

(6/14/12) - Bottled both batches with 2.9oz of priming sugar. I ended up with about 4 gallons of each  (slightly more of the non aerated version). I went with a lower amount of priming sugar in anticipation of the Brett continuing to eat after bottling. The OG for the non aerated version was 1.008 and for the aerated version it was 1.007. Each are pineapple bombs.

Tasting: Loved it and it’s a great session beer.
Tasting: The rubarb provided a nice tartness that I wanted. Although I would say there was a slight vegetable after taste that I was not too fond of. 

Monday, November 26, 2012

Beer Tasting Noms: Pretzels

I came across this recipe on Smitten Kitchen for soft pretzels that were too good looking to pass up. A few weeks ago our tasting group got together for a pre-Freetail bottle release bottle share. Since it was good Friday and I had the day off from work I had time to make them. They turned out perfect, soft, chewy, just the right amount of salt. The reason I know they were good is because people were talking about them the day after…success! Also I was able to prove to everyone that my fiancee is not the only person that can cook.

Recipe
  • 2 cups warm water (100°F to 110°F)
  • 1 tablespoon + 2 tablespoons sugar
  • 1 1/4 teaspoons of active dry yeast (1 packet)
  • 5 to 6 cups all-purpose flour, plus more for dusting
  • 1 tablespoon salt
  • 2 teaspoons canola or other neutral oil
  • 1/4 cup baking soda
  • 1 large egg
  • Coarse or pretzel salt
Process

Add yeast, 1 Tbs of sugar, and water into your mixing bowl, stir, and let sit for 10 minutes to rehydrate. Add a cup of flour to the bowl and mix with the dough hook (if using a stand mixer). Then add the salt while continuing to mix. Once combined add the rest of the flour (4 cups) and continue to mix. The dough should pull away from the sides. Keep kneeding for about 1 to 2 minutes on medium. If the dough is still too sticky add more flour a little at a time. Transfer the dough to a large oiled bowl, cover and let sit for an hour or until the dough has doubled in size. After the dough has fermented pre-heat the oven to 450F and punch down the dough. Divide the dough into roughly 16 equal pieces (I believe I ended up with 20 pieces). Cover them and let them sit for another 10 minutes.

I found it easier to roll the dough out with out adding flour. I did need to add a little bit every now and then since it would stick to the surface occasionally. I had a hard time rolling the dough out long enough, which is why I had trouble forming the traditional pretzel shape. To roll the dough out start by rolling the dough ball into a pill shape. Then start from the center and roll the dough while pressing and spreading it out the sides. The goal is go get a long piece of dough roughly 18 inches long. Mine ended up being maybe a foot long, maybe slightly longer. Place the pretzels on a baking sheet with parchment paper and cover, allowing them to rise for another 10-15 minutes.


While the pretzels are sitting start to boil water in a stock pot, the wider the better. You will need at least two inches of water. When the water starts to boil add in the baking soda and the remaining 2 Tbs of sugar. The baking soda will cause the water to foam up rapidly but it will also dissipate quickly. Add as many pretzels as you can fit to the water to poach them. Poach the pretzels for about one minute on each side, longer if you want a chewier pretzel.

Once all of the pretzels have been poached apply an egg wash to the top. For the egg wash beat 1 egg with 1 tablespoon of water. Sprinkle the tops with course sea salt and bake for 12-15 minutes, or until golden-brown.

The pretzels are best eaten in the same day but can last for two days, mine didn’t make it that long. Leave them uncovered or they will become soggy.

Tuesday, November 20, 2012

Barrel Aged Blend (It's a Trappist!)

As promised here is the update and recipe from my half of the blend. A few weeks ago my friend Mike and I brewed two separate beers an blended them together in a spent Balcony’s Blue Corn Whiskey barrel.


The brew day was efficient and also slightly problematic. We were able to brew two batches, with only one burner, in 6 hours. My half was a Belgian strong dark ale and Mike’s was an American strong ale, a la Arrogant Bastard. The issues we encountered were, my still leaky mash tun and my gravity being way too high. I was targeting 1.091 and ended up with 1.112, not sure how that happened, I’m pretty sure I didn’t use enough sparge water because I know i didn’t collect 7.5 gallons. To fix this we just topped it up with water until it matched Mike’s OG, which was around 1.07. I don’t have the recipe that Mike used but I can provide my half.

Recipe
  • Batch size: 5 Gallons
  • Est OG: 1.090
  • Measured: 1.074
  • Est FG: 1.022
  • Measured: 1.014
  • ABV: 7.8% 
  • IBU: 31.8
  • SRM: 25
  • Boil time: 90 minutes
  • Efficiency: ?? (est. 75%)
Grain Bill
  • 84% - Belgian Pilsen - 14lb
  • 9% - Dark Candi Syrup - 1lb 8oz
  • 3% - Belgian Special B - 8oz
  • 3% - Flaked Corn - 8oz
  • 1% - Carafa II - 2oz
  • 1% - Chocolate Malt - 2oz
Hops (Pellet)
  • 2.0 oz - Hallertauer - 45 minutes
  • 0.50 oz - Czech Saaz - 15 minutes
Yeast
  • Trappest High Gravity (Wyeast 3787)
Mash Schedule

60 minute Saccharification Rest at 154F

Notes:
(3/24/12) - Brewed with Mike. As mentioned above ended up being well over the target OG, topped up with 2 Gallons of water for an OG of 1.074. Shook to aerate and pitched yeast at 70F.

(4/7/12) - Racked to barrel, blended 2/5 Belgian and 3/5 American. Remaining beer was racked to a secondary carboy and flushed with CO2. For what ever reason my gravity at the time of racking was 1.040. As soon as we blended the beer started to ferment again and bubble out of the blow off hose we installed. This continued to the next day. The gravity once blended was 1.025. I’m hoping the yeast will be eat it to under 1.020, we shall see.

(4/18/12) - Bottled with 1.5 oz of corn sugar. The OG was 1.014, which is about what I was targeting. We also topped up the barrel to compensate from the blow off with some of the Belgian version.

(2/20/13) - First Tasting. Very pleased with how this beer came out. Hopefully we can get around to bottling the barrel aged version soon. 

Barrel Aged Blend


Over the past weekend a friend and I brewed a double batch to blend in the barrel he received from Freetail Brewing as a wedding gift. The barrel was a Blue Corn Whiskey from Balcony’s Distilling. We wanted to put something in it that wouldn’t clash with the sweetness of the whiskey. We decided to brew two batches and blend them, my contribution was a Belgian strong dark ale, and Mike’s was an American Strong ale, a la Arrogant Bastard. It took us 6 hours to brew the two 5 gallon batches, which in my opinion is pretty efficient, especially with only one burner capable of boiling that much liquid. I’ll post more details including a recipe and pictures later. I forgot to take a picture while brewing but will do so when we rack to the barrel.

Monday, November 19, 2012

Vapor Trails: California Common (aka Steam Ale)


The California Common was probably one of the first styles contributed by America to the brewing world. It was originally developed out of necessity. As German immigrants moved west for work they wanted to continue to drink the lagers they were used to drinking. However, California does not have the right environment for lagering in the pre-refridgeration era. The yeast for this beer is called an “ale-lager hybrid, ” which essentially means it can ferment at lower temperatures and higher temperatures. The California Common is traditionally fermented at around 68 degrees. The problem with brewing this historical style is that all the breweries that brewed it were forced to close during prohibition. After prohibition Anchor started re-brewing and bottling this beer in 1971 under the name Anchor Steam.

The BJCP style guidelines are interesting for this beer due to the fact that none of the original breweries that brewed this beer pre-prohibition exist today. Thus the style guidelines are based specifically off of Anchor’s beer. Anchor has even gone so far to trademark the name “Steam,” which is why the style is called California Common. Anchor does not reveal much about their process but does reveal some facts about the beer (basic ingredients, IBU, ABV) so a “clone” can be figured out. Rather then brew a clone I decided to brew to the style. I ended up going with the same hops that Anchor uses, but if I wanted to go a more traditional route I could have gone with Cluster hops, since those would have been growing in California at the time these beers were originally brewed. Anchor says they brew the beer in the traditional style, they use large shallow vats to cool the beer in the open air in a clean room with circular aeration (I would assume most home brewers can not do this). The steam that is generated during cooling is allegedly from where the name “steam” is derived, although that is also debated.

For this beer I was pretty traditional to the style and wanted it to be similar to Anchor’s Steam beer, since I was brewing this for my fiancee because it is her favorite beer. I changed some of the specialty malts hopefully to add a little additional malty character and complexity. I also attempted a new technique that I had read about. I read that if you add some of your initial bittering hops to the beer pre-boil it helps smooth out the bitterness. At 180F I added maybe a quarter of what I was going to put in at the start of the boil, this will increase the bitterness slightly but it won’t be significant.

I ended up having a leak in my mash tun, due to my poor assembly of my manifold (I had never had this problem before) and lost some of the first runnings. This effectively lowered my OG, but the beer is supposed to be lower then what I had calculated anyways.

Recipe
  • Batch size: 5 Gallons
  • Est OG: 1.052
  • Measured: 1.046
  • Est FG: 1.017
  • Measured: 1.008
  • IBU: 41.7
  • SRM: 11
  • ABV:  5%
  • Boil time: 60 minutes
  • Efficiency 66%
Grain Bill
  • 69% - Two-Row - 7lb 4oz
  • 14% - Crystal 40L - 1lb 8oz
  • 10% - Munich malt - 1lb
  • 7% - Victory malt - 12oz
Hops (Pellet)
  • 1.0 oz - Northern brewer - 60 minutes
  • 0.75 oz - Northern brewer - 15 minutes
  • 1.5 oz - Northern brewer - 0 minute
Yeast
  • San Fransisco Lager (WLP810)
Mash Schedule

60 minute Saccharification Rest at 153F

Notes:

(2/23/12) - Made a small 2 quart starter.

(2/26/12) - Small leak issue during mashing caused my OG to be 1.046. Other then that no issues brewing. Chilled to 70F shook to aerate and placed carboy into a bucket of ice water to bring the temp down a little further. Pitched yeast a few hours later.

(2/27/12) - Fermentation starting after 12 hours showing a small krausen, I added more ice to the water bath to keep the temperature down. After 24 hours the krausen is about 1.5 inches thick.

(3/14/12) - Gravity down to 1.008, definitely drier then I was planning. It tasted good, kind of like a toastier version of Anchor Steam. Even though the gravity was lower then I would have liked it still seemed like there was some body, I was worried about that when I first read the gravity. The beer looks remarkably clear, easily the clearest beer I’ve brewed, got to love that lager yeast.

(3/17/12) - Bottled with 1/3 cup of table sugar. Total was two cases and two extra 12 oz bottles.

(5/29/12) - First Tasting. I’ve actually been drinking it for a little while and it’s drinking great right now. I just haven’t had time to get around to typing up my review.

Friday, November 16, 2012

First Tasting: Breakfast Stout


Founders is on the left and my home brew is on the right.

Not too long ago I mentioned how I don’t like cloning beers. I will clone beers if, I can’t buy them off the shelves, or if they are one of the best examples of the style. Well I wanted to brew an imperial oatmeal stout with chocolate and coffee, what better beer to model then Founder’s breakfast stout. This recipe was not a true clone but it was a similar representation of the style. The biggest factor that I wanted to emulate was the coffee flavor and aroma. Sadly this was the part that I failed.

I was lucky enough to receive a Founder’s Breakfast Stout in the mail from a recent trade that was bottled on roughly the same day my home brew was bottled. This gave me a pretty good comparison between the two. To no surprise the commercial version had a much bigger coffee aroma and flavor. I think next time I’ll just add the beans into the secondary and take samples and bottle when I feel it’s where I want it.

I also found another option for the coffee addition while trying to research Surly Coffee Bender. Most brewers are mum about their coffee process, but I was able to find an interview with the brewer of Surly.
They mentioned using a cold press method for their coffee addition, however; instead of water, they used their beer.

Review:

Appearance: Black with a thick brown head about two fingers thick that lingers and slowly fades into a lacing over the top of the beer. Similar appearance to the Founder’s version, however; my home brew had better head retention. I can only assume this was due to their process for coffee addition.

Aroma: The FBS had a huge coffee aroma mixed with chocolate, roasted grains, and vanilla. My beer had a subtle coffee aroma with a big chocolate, mocha, vanilla, toffee aroma. (I might also cut back on the cocoa nibs)

Flavor: Again FBS had a great coffee flavor, complimented with chocolate, toffee, and roasted grains. My beer was much more chocolaty and roasty, with subtle coffee, toffee, and bready notes.

Mouthfeel: The FBS had medium-full body with low carbonation and a lingering coffee flavor. For some reason it appears that my bottles unevenly carbonated. I feel this is due to the way I split the batch and was not confident with how much was left (if I carbonated for 4 gallons and only had 3.5 gallons, it would over carbonate, which I think is what happened). Once degassed a little the mouth feel is medium-full with a lingering chocolate, mocha finish.

Overall: Although it was not the same I’m actually very happy with how this beer turned out. I still want to work on the coffee addition method. I might split my next RIS and test a separate coffee method.

French Baugette

I was finally able to bake a French style baguette that I enjoy. Normally my baguettes come out too dense or too floury tasting. I decided to make a starter this time to help add to the flavor, good bread like good beer takes time. On top of that I wanted to make it lighter and airy, so I kneaded it like crazy in our stand mixer. We ended up using this bread for the mini sandwiches that we made for our Superbowl party.

The recipe that I used was from the Joy of Cooking. I’m definitely going to try to make these again. I might experiment with cooking temperatures and baking times to adjust the thickness of the crust.

It was also nice getting to use our new baking stone, which I think definitely helped create a more even heat distribution within our cheap apartment oven. Next up! Mastering Pizza dough.

Thursday, November 15, 2012

Fuller's London Porter Clone

Personally I don’t understand why people clone readily available beers, other then to compare them to make sure you know what you’re doing. My opinions on cloning beer consist of
  1. If I can’t find it on the shelves or I can’t get enough of it I will clone it
  2. If it’s really expensive to buy, but not as bad to clone aka sours
I have cloned a beer before, Breakfast stout, but I can’t buy it in Texas. I do enjoy the act of formulating a recipe for a clone. I enjoy having to research the beer, especially if I have not had it before, and trying to determine the ingredients based off of other people’s reviews.

This beer was a beer that my father wanted to clone. So I told him that I would help him with the recipe. To formulate this recipe I read reviews on BeerAdvocate and researched the brewery to determine, yeast and regional hops/malt. The reviews gave me an idea of what characteristics that I should be targeting aroma, flavor, and mouthfeel. The result is below

I don’t have a picture comparing the two different beers (the commercial example and my clone). They were surprisingly similar. The commercial example was slightly lighter and more clear. My clone had better head retention. The commercial example actually had a lighter body and more carbonation with a drier finish then what I was expecting. The biggest difference, which I assuming either came from fermentation temperature or the age of the commercial beer was the large amount of fruity aroma. I was shocked at the fruity esters that the commercial beer contained.

Recipe
  • Batch size: 5.0 Gallons (finished with 5.5 Gallons)
  • Grain Bill: 11lbs 12 ounces
  • Anticipated OG: 1.055
  • Measured FG: 1.058
  • Measured OG: 1.015
  • ABV: 5.6%
  • Anticipated SRM: 38 degrees
  • Anticipated IBU: 30.3
  • Boil time: 75 minutes
Grain
  • Marris Otter - 8.5 lbs - 72%
  • Brown Malt - 1.5 lbs - 13%
  • British Crystal 70L - 1 lbs - 9%
  • Chocolate Malt - 0.75 lbs - 6%
Hops
  • Fuggles - 1.5 oz - 75 min (Pellet)
  • Fuggles - 0.5 oz - 10 min (Pellet)
Extras
  • Yeast nutrient at 15 minutes
Yeast
  • London ESB - 1968
Mash Schedule
  • Saccrification at 153F for 60 minutes
Notes

Brewed Oct. 22 with my Dad.

(10/22/11) - Measured OG at 1.058, close enough, if I was really anal about it I would add some water.

(11/14/11) - Down to 1.015 and bottled with 3.3oz of table sugar. I left this part up to my Dad since the beer was brewed in Austin and I didn’t want to drive back up just to bottle.

(11/24/11) - First tasting:

Appearance: Hazy dark brown with reddish hues and a fluffy off white head that lingers and leaves a thin lacing over the top of the beer. I preferred the appearance of my beer compared to the commercial example, although the clarity was better on Fuller’s.

Aroma: Roasted grains, bready notes, toffee, and a hint of chocolate. Classic porter aroma, pleasing but not particularly complex. This was the biggest difference between the clone and Fuller’s. Their beer was very fruity and lacked the roasted notes that I was expecting.

Taste: Toasted bread, a touch of chocolate and coffee with roasted grains rounding it out. This was pretty similar to the commercial example, although, again their beer had more fruit elements.

Mouthfeel: Medium body with clean finish and way over carbonated. I’m still not sure what happened exactly. Either my father used too much sugar or the beer is infected. The beer sat in primary for 3 weeks before it was bottled. I know I gave him a reasonable amount of priming sugar, in fact I know it was a little lower then what was suggested, because I don’t like highly carbonated beers. The other explanation is an infection. My Dad buys a lot of his equipment off of craigslist. The problem with this is that you don’t know the condition that the gear was stored and you don’t know if the person you’re buying it from was using Brett. I still have two bottles left and will hold on to them to see if any signs of an infection show.

Overall: Other then the fruity aroma and flavor and the carbonation issue, the beers were remarkably similar. I think I did a pretty good job since I had never had the beer before.  Since I don’t know what happened with the carbonation I can’t say what I would change. I’m also not sure why the Fuller’s was so fruity, my assumption was because of age and slight oxidation.

Wednesday, November 14, 2012

First Tasting: Pumpkin Ale

Well better late then never. My pumpkin ale has actually been ready for a while, I just haven’t had time to post a review of it yet. I pretty pleased with the way it turned out and it was perfect for the pumpkin party that we hosted a few weeks ago. There are a few things that I might change next time, if I decide to brew this recipe again. Next time I brew a pumpkin ale I will probably take the roasted pumpkin and put it in my food processor before adding it to the mash. I don’t think enough of the pumpkin was extracted by just tossing in the cut up pumpkin. I think I will also cut the pumpkins in half and roast them before slicing them up. Prior to the pumpkin party a couple of my beer nerd friends and I had a pumpkin beer tasting. The unanimous winner was Unita - Oaked Jacked Imperial Pumpkin Ale. It was a pumpkin ale that was aged in spent bourbon barrels. I might try to replicate something like that next year for the pumpkin party, or perhaps something along the lines of a Midnight Sun - Treat, which is a chocolate imperial pumpkin ale.

Appearance:  Slightly hazy orange-amber with yellow hues around the edges and a thick, fluffy off white head about two fingers thick with decent head retention that forms a thin ring around the center with patchy lacing.

Aroma: Subtle spice notes, cinnamon being the dominate with hints of clove, allspice and nutmeg. There are some nice malty notes that come through, but not as bready as I was hoping for and not much gourd.

Taste: Spicy up front with again cinnamon taking the lead and complimented by allspice and nutmeg. There are some nice malty flavors and a hint of fruitiness. Like the aroma there is not much gourd flavor.

Mouthfeel: Medium bodied with medium carbonation and a slightly sweet finish. I’m pleased with the carbonation level and the body of this beer.

Overall: I’m very pleased with how my first pumpkin ale turned out. I was mostly concerned with over spicing the beer and making it undrinkable. I think I did a good job in adding a small amount of spices at first, knowing that I could always add more, but couldn’t take any out. Next time I want to attempt to produce more gourd flavor/ aroma. I will either attempt to add more pumpkin using the procedure I mentioned above or (possibly both) adding a small amount of lactose. The Bruery does this with their Provisions Series: Burly Gourd. I personally don’t normally like lactose in my beers, but this one gave it, in my opinion, an increase perception of gourd flavor and aroma. Next year I’ll plan ahead a little bit better so our pumpkin party can actually be during pumpkin season.

Tuesday, November 13, 2012

First Tasting: Humulus Belgica

I’m pretty happy with the way my Belgian IPA turned out. There are a few things I would change, for one, I would probably dry hop with whole hops. I think that the aroma would be bigger and cleaner if I used whole hops for dry-hopping instead of pellets. I would also ferment at a lower temperature to reduce the fusel alcohol flavors. I would also probably leave the beer on the dry-hops for a little bit longer, perhaps 10-12 days, instead of 8 days, but I was worried about grassy aromas.

Appearance: Hazy orange-yellow with a fluffy white head about a finger thick that lingers and slowly fades to a thin lacing over the top of the beer. I don’t mind that it’s hazy, Belgian yeast, especially Trappist yeast are notoriously bad at flocculating.

Aroma: I’m pleased with the aroma. I would have liked the American hop aromas to be a little more apparent, but I think they mix with the Trappist yeast perfectly. There are notes of grapefruit, citrus, and spices such as cinnamon, and clove.

Taste: Surprisingly sweet tasting considering it dried out pretty low. It’s bready and earthy with spicy notes. The hops provide a nice grapefruit touch. Next time I might decrease the amount of candi sugar and lower the mash.

Mouthfeel: Medium body with medium-low carbonation and a dry finish with a short lived bitterness. There is a touch of booziness on the back end, but it has faded with time in the bottle. Next time I’ll try to ferment a little cooler.

Overall: I’m very pleased with how this one turned out. There are a few things I would change but over all I’m really happy with it.

Monday, November 12, 2012

Breakfast Stout

With “winter” (I live in south Texas so that term is relative) I felt compelled to brew a big Imperial Stout. I wanted to base mine off of Founders Breakfast stout. This is one of few Imperial stouts that is actually better fresh then it is aged. The reason for this is the coffee aroma that is provided by the coffee they add post fermentation. I plan to do the same thing to mine. I plan to add coffee and chocolate to secondary in order to give it a bit chocolate and coffee aroma. I also plan to rack a little bit into a second carboy and add some cherries.

In certainty looks the part of a big mean chocolatey imperial stout.  I also decided to do a little water chemistry with this batch for the first time. Whenever you have a large percentage of roasted grains you can often end up with an astringent final product.  To counter act this you can up the calcium content of your water.  I added a touch of baking soda to the mash to keep the pH in check while it was mashing, hopefully this will keep the astringency from becoming overwhelming due to the roasted grains and black patent.

I ended up being about 80% efficient, which is good; however, I was estimating 75% efficiency. I ended up adding some more of my third runnings to the boil to lower the gravity. This was effective, but I lowered it a little too much and finished with 1.089. Only 2 points under so not a big deal.

  • Batch size: 5.0 Gallons (finished with 5.5 Gallons)
  • Grain Bill: 18lbs 9 ounces
  • Anticipated OG: 1.091
  • Measured OG: 1.089
  • Measured OG: 1.023
  • Anticipated SRM: 40 degrees
  • Anticipated IBU: 50.7
  • Boil time: 90 minutes
  • ABV: 8.5%
Grain
  • Marris Otter - 13.5 lbs - 74%
  • Flaked Oats - 1.5 lbs - 9%
  • Belgian Chocolate Malt - 1.125 lbs - 6%
  • Crystal 120L - 0.625 lbs - 3%
  • Carafa Special II - 0.56 lbs - 3%
  • Coffee Malt - 0.5 lbs - 3%
  • Black Patent - 0.25 lbs - 1%
Hops
  • Willamatte - 2.5 oz - 75 min
  • Willamatte - 0.25 oz - 30 min
  • Willamatte - 0.25 oz - flamout
Extras
  • Yeast nutrient at 15 minutes
Yeast
  • American Ale - 1056
Mash Schedule
  • Saccrification at 155F for 60 minutes
Notes

(10/29/11) - Brewed by myself. Preboil OG at 1.068, well over my target of 1.062. This would leave me with a beer of 1.099. I added some extra 3rd runnings to bring the gravity down. Finished with 1.089 measured. Chilled to 70F and placed in my bottling bucket with water and ice. Pitched yeast from a starter made earlier in the week using the yeast from my pumpkin ale, shook to aerate.

(10/30/11) - Small krausen formed on top with rapid bubbling from the air lock. I’ll keep adding ice to keep the fusels under control.

(11/1/11) - Taking a gravity reading I noticed the krausen almost reached the bottom of the air lock. Gravity down to 1.027, I expect it to fall another 2 or 3 points by the time I rack to secondary. Right now great roasted, coffee, and chocolate aroma with no perceivable alcohol. Pretty excited for this one.

(11/20/11) - Racked to secondary and took another gravity reading, down to 1.023. Didn’t have cacao nibs at the store so I’ll get some tomorrow at a different location. No apparent alcohol even at over 8.5% ABV.

(11/21/11) - I added about half of the cacao nibs I bought yesterday, which should be close to 2 ounces. As they sink to the bottom I will add more cacao nibs, but right now the carboy is a little full.

(11/31/11) - Racked a gallon off to a one gallon carboy and added two drops of cherry extract.

(12/2/11) - Used 1 cup of coarsely ground Ruta Maya Shade Grown Organic coffee and added it to a mason jar with 4 cups of water. Placed in the refrigerator to cold brew over night.

(12/3/11) - Strained the coffee with a coffee filter and then boiled the coffee for 5 minutes. Placed the pan with the boiled coffee into an ice bath. Poured the coffee into a sanitized mason jar and back into the refrigerator to chill over night. This procedure produces coffee that taste like coffee smells, without the oils and astringency from hot brewed coffee.

(12/5/11) - Added coffee to bottling buck and primed with 0.20 cups of priming sugar. Primed cherry portion with 0.8Tbs of table sugar.

(1/18/11) - First tasting. Very good, a little over carbonated, but nothing a little degassing can’t solve. I need to work on the coffee addition to get the burst of coffee aroma and flavor I was looking for.

Friday, November 9, 2012

Spent Grain Bread

I see the question pop up every now and then asking about what other people do with their spent (used) grains after brewing. Depending on the size of your batch and target OG you will probably end up with a lot of left over grains, especially if you are an all grain brewer.

My answer to this question involves bread. I usually take a pound or so of grains after I’m done and save them to make bread. The process is pretty simple and I feel the bread turns out really well. The bread will taste different depending on the type of beer you are making.
Ingredients
  • 2 cups Whole Wheat flour
  • 1 cup Bread flour
  • 1 cup Spent grains
  • 0.25 cup Agave nectar
  • 1.25 cups warm Water
  • 2 Tbs melted Butter
  • 1 Egg
  • 1 1/8 tsp Yeast
Process
1. Hydrate yeast with 0.25 cups of warm water for 5 minutes.
2. Mix all of the dry ingredients in a bowl.
3. In a separate bowl (or stand mixer) mix the egg, Agave, butter, then add the yeast mixture.
4. Add the spent grains to the wet ingredients and mix.
5. Slowly add in the dry ingredients while you mix.
6. Kneed for 10-15 minutes by hand or about 3-5 minutes with a dough hook on low. Add flour or water if necessary. The dough will be pretty sticky but it should still hold its shape.
7. Transfer to a greased bowl and cover to let rise for one hour in a warm area.
8. Transfer to a loaf pan and cover for second rise, approximately 45 minutes.
9. Preheat oven to 375F and bake for 40-45 minutes, or until the bread sounds hollow.
10. Place on a drying rack, wait 10 minutes, then serve.

Thursday, November 8, 2012

Jack SkALEington - The Pumpkin King

Last weekend I brewed a pumpkin ale for the first time. I’ve heard a lot of people say that you don’t need to add pumpkin, since pumpkin has such a mild taste. All you need to do is add pumpkin pie spices and you get the affect of drinking pumpkin pie. Although I wanted the spices, I also wanted a little pumpkin, gourd, taste.

There are too schools of thought for the pumpkin addition. Some people say to add roasted pumpkin directly into the mash, others say to add canned pumpkin to the boil. I decided to cut a real pumpkin and add it to the mash, which I figured was more traditional (traditional pumpkin ales actually use a lot more pumpkin and are actually sour due to being cooled over night in barrels).
Most people also say that there is a real problem with stuck sparges with pumpkin in the mash, which is another reason they avoid it. I was prepared for this and bought a lot of rice hulls. During my lautering I did not experience any trouble with a stuck sparge.

Before I started brewing I sliced up the pumpkin and roasted it at 400F for 40 minutes. I wanted to use 3 lbs of pumpkin, honestly, I’m not sure how much I used due to my lack of a scale. The pumpkin itself weighed about 8lbs, assuming I can only extract half of that weight in pumpkin meat, I was left with 4 lbs. I could only fit so much in our oven, so about 1/4 of it was left out. This should leave me with around 3 lbs. That amount seems pretty accurate because I used the scientific method of holding a 2lb bad of sugar in my hand and the pumpkin in my other hand, the pumpkin seemed heaver.

(Pre-roasted pumpkin)
(Post-roasted pumpkin)
 
If there is not as much pumpkin flavor as I would like I might add some to secondary. With the left over pumpkin, I put that into our food processor and made some pumpkin puree. We then used the pumpkin puree for pumpkin corn bread, which is also very tasty and a great snack while I’m at work.
For some reason my final volume was higher then what I was targeting. I’m assuming my boil off rate was lower. I guess the boil was not vigorous enough. This in return lowered my original gravity. I just left it alone, because I’m not concerned with 0.007 points. I also went with a longer mash in an effort to increase my efficiency by allowing the water more time to reach dry spots and convert starches. I also went with a double batch sparge technique again. My pre-boil gravity was right where I wanted to be, thus, I was 75% efficient while mashing, but ended up being 69% efficient overall.

Jack SkALEington - The Pumpkin King

Stats
  • OG Estimate: 1.068 (Actual: 1.061)
  • FG Estimate: 1.015
  • Measured FG: 1.011
  • IBU: 32.4
  • SRM: 15 Degrees
  • ABV:  6.5%
  • Batch size: 4.25 gallons
  • Boil time: 90 minutes
  • Estimated efficiency: 75%
Ingredients
  • 7.25 lbs American Two-Row
  • 3 lbs of Fresh pumpkin
  • 1.25 lbs Munich Malt
  • 0.5 lbs Biscuit Malt
  • 0.5 lbs Brown Sugar
  • 0.25 lbs Belgian Special B
  • 0.25 lbs Aromatic Malt
  • A hand full of rice hulls
Hops (Pellet)
  • 60 min - Mt. Hood - 1.0 oz
  • 15 min - Mt. Hood - 0.75 oz
  • 5 min - Mt. Hood - 0.25 oz
Mash Schedule
  • Single infusion 155F for 75 minutes
Yeast
  • American Ale Wyeast 1056
Extras
  • Cinnamon - 0.5 tsp
  • Nutmeg - .025 tsp
  • Clove - .025 tsp
  • Pumpkin spices- .025 tsp
  • Yeast nutrient - 1 tsp
  • Irish moss - 1 tsp
Notes
(10/2/11) - Brewed by myself. I added the sugar at the last 25 minutes hoping for a little extra flavor from some caramelization. The yeast nutrient and Irish moss were added in the last 15 minutes. The spices were added with the last hop addition. I cooled to 80 degrees, shook to aerate, and pitched the yeast from a starter I made two days before.

(10/3/11) - A nice thick krausen has formed about 24 hours after pitching. The spices are present but they don’t seem overwhelming.

(10/15/11) - Gravity down to 1.011 with a nice subtle spice aroma just like I wanted. Not much pumpkin flavor but I’m not to picky about that. It might come out more as the spices fade.

(10/24/11) - Bottled with 1/3 cup (4.4oz) of table sugar.

(12/21/11) - First tasting notes.

Wednesday, November 7, 2012

Humulus Belgica

(Disclaimer - the stuff on the carboy is on the outside, it’s just hard water)

The name of this beer comes from the scientific name for hops Humulus lupulus and from the Roman name for Belgium Belgica. Putting the two together roughly hoppy Belgium.This beer is a Belgian IPA, or more specifically a Belgian Tripel dry-hopped with American aroma hops. I went with a simple gain bill using traditional Belgian ingredients and home made Belgian Candi sugar again.

My Belgian candi sugar came out better this time then it did last time.

As you can see it came out clear as compared to my last time when it was opaque. It’s also a little darker because I boiled it a little longer. I went with a 15 minute boil of the sugar at 265F.  This is the process I used to make my candi sugar.

The recipe I used is based off of a hoppy Tripel that Mike (Mad Fermentationist) made a while back; however, I decided to up the dry-hopping and I took his advice and mashed at a lower temperature and added more sugar in an attempt to dry out the beer and lower the final gravity.


Details
  • Batch size: 4.25 Gallons
  • Boil length: 90 minutes
  • Grain bill: 14lbs
  • Estimated Efficiency: 75%
  • Anticipated OG: 1.076
  • Measured: 1.076
  • Anticipated FG: 1.017
  • Measured OG: 1.014
  • ABV:  8.1%
  • Anticipated SRM: 5 (yellow to golden)
  • IBU:42
Grain
  • 7 lbs Belgian Pilsner
  • 5 lbs Belgian Pale Malt
  • 1.5 lbs Homemade Belgian Candi Sugar
  • 0.5 lbs German Wheat malt
Hops (pellet)
  • 60 min - 0.5 oz - Cascade
  • 60 min - 0.5 oz - Crystal
  • 60 min - 0.5 oz - Sterling 
  • 15 min - 0.25 oz - Cascade
  • 15 min - 0.25 oz - Crystal
  • 15 min - 0.25 oz - Sterling
  • Flame out - 0.25 oz - Cascade
  • Flame out - 0.25 oz - Crystal
  • Flame out - 0.25 oz - Sterling
  • Dry hop - 0.75 oz - Amarillo
  • Dry hop - 0.75 oz - Centennial
  • Dry hop - 1.0 oz - Falconer’s Flight
Yeast
  • WL 500 (Trappist)
Mash Schedule
  • Sacch Rest 149F - 60 minutes
Notes:
Brewed on 9/11
Heated 4 gallons of strike water to 160 degrees, missed target mash temperature by one degree; however, over an hour it will fall to 149F (not that that will really matter much). Stirred every 15 minutes and lautered about 2 gallons of first runnings.

Side note - I only mashed 12.5 lbs of grain because I put the sugar in at the end of the boil.
Preformed a double batch sparge. Heated 5 gallons of spage water to 185F and poured half in, stirred and let rest for 10 minutes. Lautered second runnings, re-heated the rest of the sparge water to 165F poured in and stirred. I needed 6.7 gallons for boiling, ended up with a little extra.

Efficiency was better then I expected (81%) so I topped off my boil with the remaining third runnings. This should add volume with a minimal amount of sugar, thus lowering my gravity.

Added Candi sugar at the 15 minute mark along with yeast nutrient and Irish moss.

Added flame out hops once I cooled the wort to under 180F to preserve as much of the hop aroma as possible.

Cooled to 80F (as low as I can get with my current set up), aerated, and pitch a big healthy yeast starter (about 2 quarts). Took a gravity reading, 1.076, hit my target!

I ended up with 5.25 gallons, adding the extra third runnings lowered my IBUs to 32IBU, not a bad thing.
A few hours later a small krausen formed.

(9/12/11) - Two inches of krausen and vigorous fermentation.

(9/13/11) - All of the krausen has dropped out of suspension, not sure, why and I can see it still fermenting away, It smells amazing right now. The beer is also a little brighter orange now and slightly opaque, probably from the yeast.

(9/14/11) - A small layer of, what I presume is krausen, has formed on top again and fermentation appears to have slowed.

(9/17/11) - Gravity down to 1.014, might lower another point or two by the time I bottle, but I’m ok with where it’s at now. Still smells really good, spicy, fruity, and yeasty. Really boozy at this point but at 8.3% ABV that is to be expected when the beer is this young. The yeast should clear that up over time.

(10/2/11) - Racked to secondary to clear room for my pumpkin ale in my primary carboy. Took another gravity reading, down to 1.011, just about what I was looking for in an FG. Dry-hopped it wih .75 ounces of Centennial and Amarillo hops and with 1 oz of Falconer’s Flight.

(10/11/11) - Bottled with 0.21 cups (2.8 oz) of table sugar. Smelled really good, very fruity and spicy. I think the combination of the hops and the yeast worked well together.

(11/28) - Tasting notes.


(after dry-hopping, I know I don’t have a bag, thus, I will have to filter it)


Tuesday, November 6, 2012

First Tasting: Saison de Scully


So this beer is named after our cat, who in return is named after another red head from the X-Files.  The recipe can be found here. This is the regular version, the sour version is still souring away.

Appearance: Light yellow-orange, a little hazy then I would have preferred. I meant to put Irish moss in at the last 15 minutes but I forgot. I’m not sure how much it would have helped. The head retention is insane, a huge rocky head about 3 fingers thick from a slow pour that very slowly fades, yet remains at least a centimeter thick through out the whole beer.

Aroma: Spicy and fruity, coriander, a subtle clove aroma mixed with pineapple, green apples and peaches. I’ve very pleased with how the aroma turned out. The only hops that I used were bittering hops, so all of the aroma was provided by the yeast.

Taste: Spicy and yeasty, with a touch of clove and peach. It might be a bit sweet but it’s not that big of a deal.

Mouthfeel: Perhaps a bit over carbonated. It took me a while to get around to review this beer because at first it was too over carbonated. It is either because I used too much priming sugar or because of the nature of this yeast it was not finished eating and then I added more sugar. It has calmed down since the first bottle I tried and is no longer gushing out of the bottle. The first few sips are still very bubbly but after a minute or two it calms down to a nice level of carbonation. I also would have preferred it to be a little drier and a little lighter in body.

Overall: I’m very pleased with how this beer turned out. The aroma is complex and very nice, the taste also has a nice level of complexity. It is a little over carbonated and a little too sweet. I mentioned the carbonation issue, but didn’t go into detail about the body. The body and sweetness comes from the unfermented sugars. Typically a Saison will terminate at 1.008 or lower, mine was bottled at 1.011, which probably accounted for the extra carbonation. The reason I bottled it at that at that gravity is because I was splitting the batch and wanted some sugars for the brett and bugs to eat. What I should have done is wait for the beer to hit a lower gravity, probably 1.008 or 1.006 and then split the batch. After splitting I would then add maltodextrin to the souring batch because brett loves to eat that stuff. Oh well, either way I’m happy with the way it turned out. Tasty and refreshing!

Monday, November 5, 2012

Oaked Sour Saison (Sassy Saison de Scully)


Kind of a slow day at work, plus it’s a Monday so I don’t feel like working. I don’t remember what the details I provided regarding my sour ale were so I figured I would post this since it technically is a different beer.  About two months ago I brewed a Saison using the recipe here. It was a 6 gallon batch that I fermented in primary together. Well after about 7 weeks the beer finally got down to a gravity that I was looking for and I proceeded to bottle half of it. I wanted to have a base to compare my oaked sour version. After I racked half of my beer (about 3 gallons) into my bottling bucket, I took the other half and racked it into my 3 gallon secondary carboy. Prior to brewing my Saison I took some Hungarian oak cubes (about .75 ounces) and boiled them for about 15 minutes to remove some of the tannins. The oak cubes were then placed in a mason jar with some Pinot Gris and left to soak until I was ready to split the batch. I believe the soaked for around 8 weeks, my notes should say. I wanted a used wine barrel feel from the oak cubes.

After I racked the Saison into the secondary carboy I made sure to siphon a little bit of the trub. Brett will eat autolyzed yeast, among other things. I took the oak cubes and placed them into a sanitized bag (paint strainer) and squeezed them through the opening. When I had the oak cubes in the carboy I opened the Russian River Temptation, provided by jwjon1, and slowly poured it into a glass. I left a little bit of beer remaining in the bottle, proceeded to swirl the bottle, and then poured it into the carboy. Within the dregs of this bottle lie my souring agents. The Temptation contains Russian Rivers special blend of Brettanomyces, Lactobacillus, and Pediococcus. There were not a lot of residual sugars left in the Saison (gravity was down to 1.011 at bottling) but there are enough from them to eat. The Lacto and Pedio will provide the sourness, while the Brett will help to clean up the DMS that the Pedio leaves behind, while providing some extra aroma and flavor.

The only problem is that they work slowly, I wont know if the beer is being soured for at least 2 or 3 months, possibly longer. I will just have to take samples every couple of months to see if it is at a place that I like. Sour beers are about feel and less about timelines and precision.  Ideally I would have a different batch to blend to taste, but I don’t have that luxury. Hopefully it will turn out to be something tasty but only time will tell.

Notes:

(8/6/11) - Racked onto wine soaked oak cubes with the dregs of Russian River Temptation and placed under the stairs.

(9/31/11) - Added a little food for the Brett. I boiled a mix of 1/8 cup DME and 1/8 cup Maltodextrin (Brett loves to eat Maltodextrin). It still smelled like my regular, base Saison. Spicy, fruity, and floral.

(10/6/11) - A nice pellicle has formed on the top of the beer… that’s a good sign. I’ll probably take a taste test maybe in another month or so to see where it’s at in the souring stage. Mostly to see if it’s changed at all. 

(10/5/12) - Finally took a taste test. Nice and sour, pretty high acidity. I'll definitely bottle soon. I need to borrow my Dad's corker so I can cork the bottles. I don't have to do that but I'd like to. My plan is to add priming sugar and some brett-brux. Maybe I'll brew a 100% brett-brux IPA to use the rest of my citra hops and use a little of the yeast for bottle conditioning.

(11/23/12) - Bottled with 0.6 cups of table sugar and a bit of the Brett-Brux Trois that I made a starter for the Brett IPA I'm brewing. I chose to use 29mm caps since I wanted to use the thicker Belgian style bottles. Little did I know that I need a different capper. I got them on but so far 4 of them have leaked. I'm going to buy the attachment I need to cap them correctly and then recap and wax just in case. 

(8/20/13) -  First Tasting. Very pleased with the results. Time well spent. Wish I had more bottles.

Friday, November 2, 2012

DIY: Waxing Bottles

About two weeks ago I decided it was time to wax the beer bottles I have in my cellar. Most of the beers in there I don’t plan on aging for that long; however, it doesn’t hurt to still wax the tops since I had a pound of wax.  I purchased the wax pellets from my LHBS.

It’s fairly common to find breweries that wax the tops of their bottles, generally this is done for special release bottle, beers that are meant to be aged. The reason for this waxing is to create an air proof seal between the bottle cap and the bottle. Usually air can slowly enter a beer through the seal of a bottle cap, very slowly; however, over a large amount of time this can cause oxidation off flavors and aromas in your beer. I wanted to wax some of the bottles that I was planning on aging, because that brewery, for whatever reason, uses twist-off caps. Those caps are notorious for not creating a tight seal.

I generally would recommend if you are planning on aging a beer for 2+ years that it is good to wax the cap to prevent oxidation. I had the time and the wax so I decided to go ahead and wax pretty much all of my beers.

Instructions


  1. Make sure all the beers you are going to wax are at room temperature. For me this meant pulling out most of my beers from my fridge in the morning, even though I probably should have done this the night before. The reason is because the bottles will form condensation while they are warming up and you don’t want that to form under the wax. The water from the condensation will also have negative effects on the consistency of the wax.
  2. Place the wax beads, or what ever else you choose to use (I’ve heard of people mixing crayons and glue from hot glue guns before, but regular paraffin wax worked for me) in an old soup or tin can. Make sure the label is removed from the can and the can has been cleaned. Place the can with wax on a burner and turn the burner on to low heat. I believe we had the heat setting set to around 2 or 3, you don’t want it too hot, or else you will burn the wax.
  3. As the wax slowly melts stir it with a stick, we used a wooden skewer, to break up any wax chunks.
  4. Once the wax is evenly melted dip the top of the bottle in the wax and remove. 
  5. Carefully rotate the bottle to allow for even cooling. Once the wax cools, dip the bottle again and repeat the rotating process. The second layer helps to make sure there are no missed spots around the underside of the cap. To help prevent missed spots we found out that holding the bottle upside down while you rotate it and let the wax drip off helps to fill in the cap seal. 
  6. The final step is to set the bottle to the side and let the wax cool. It shouldn’t take very long for the wax to finish cooling, I think it only took about a minute. Once you are done you now have an air tight seal for your bottles.  

We used about two thirds of the wax, maybe, and waxed probably over 200 bottles.

Thursday, November 1, 2012

Saison de Scully


Well I finally decided to post what I did for my last beer. This is going to be my most ambitious beer to date. I brewed a 6 gallon Saison batch. I plan on taking half of the batch and bottling it and the other half will be racked into my 3 gallon carboy on top of Hungarian oak cubes, which have been soaking in a Pinot Gris for 5 weeks, and topped off with the dregs from a Russian River Temptation (thank you jwjon1 for providing me with that).  The oak aged sour batch, which I dubbed Sassy Saison du Scully, should develop a nice funky sourness if all goes according to plan. The Russian River beer will be adding their special blend Brettanomyces, Pediococcus, and Lactobacillus.  This beer will need to condition and develop for a few months. Periodically I will take samples of it to judge whether or not it is ready for bottling.

Back to the current beer. This was my first attempt at an all grain batch on my own. Honestly it was not that hard, so if you’re afraid to take the step to all grain don’t worry about it. The hardest thing was lifting and pouring the strike and sparge water and moving my mash tun off of the ground (also standing outside in the Texas heat next to a turkey fryer was not that fun). I had a little trouble cooling the wort because I didn’t have enough ice to cool the water using my pre-chiller.

I pitched my yeast at too hot a temperature then I would have liked, it was around 80 degrees F.  Luckily, the yeast I used (Wyeast 3724 Belgian Saison) prefers hotter temperature for fermentation, but it should still be pitched at a lower temperature (around 60F) and then ramped up gradually.

If you haven’t used 3724, or the WL version whatever their number is, then you probably are not aware of the issues people have with this yeast. This yeast likes to be ferment at around 90 degrees F two days after pitching in order to prevent it from stalling at around 1.030. I did not have the ability to raise the temperature. I’ve read that people have kept it at an ambient temperature of 72-74 degrees F and had no problems. It also will stall often for beers with a starting gravity of 1.060 or greater. In order to prevent a stall, ramping the temperature will help finish it off or if you don’t have that capability, like me, then you have to go with option two. Option two takes more time, uses a lower temperature and a really big starter. I checked my beer about three weeks ago and sure enough it stalled at 1.031. It has slowly continued to ferment and is steadily producing bubbles from my blow off tube. Last time I checked about a week ago it had dropped a bit. My problem was that I couldn’t raise the temperature and I didn’t make a large  enough starter. I recently stirred the yeast cake in hopes of reactivating the dormant yeast. I will check the gravity again this weekend, if that didn’t do anything I will probably buy a packet of US-05 and finish it off.


Here are the details for my Saison. So far it smells amazing, it just needs to drop to 1.010 or under. Fingers crossed…

Ingredients

Grain Bill
Batch size 6 gallons (Brew date 6/19)
OG: 1.053 (anticipated 1.061, efficiency 59%)
FG: 1.011 (anticipated 1.012)
ABV: 5.5% (anticipated 6.4%)
IBU: 16
SRM: 6 degrees
Total grain bill 13.375 lbs.
————————————-
  • 11lbs 4oz German Two-Row
  • 1lb 9oz English Marris Otter
  • 1lb 6oz Light Belgian Candi Sugar (see how to make Belgian Candi Sugar)
  • 13 oz Rye malt
  • 0.6oz Caramunich I
Hop Schedule
  • 1oz East Kent Golding @ 60mins (AA 5.7% Whole hop)
Yeast
  • Wyeast Belgian Saison 3724
Process

Using my home made mash calculator I calculated
Strike temperature of 160F for a single infusion mash of 149F for 60 minutes. I calculated roughly 5.75 gallons of strike water.

Sparge at 169F by using strike water at 196F. I also calculated 6 gallons of sparge water.
My total boil volume was 9 gallons for 90 minutes bring my final total to 6.75 gallons in order to compensate for losses to hops, trub, etc. so I can finish with a 6 gallon batch.

I made a half liter starter the day before (I should have made a larger starter).
Cooled and pitched yeast at 80 degrees (should have been cooler but I ran out of ice).

(6/21/11)Vigorous fermentation the first day after pitching, calmed down after 2 days.
Moved up stairs to warmer area in hopes of preventing stall.
Left for vacation and turned off A/C hopefully it will get up to 90 degrees and not stall.

(7/3/11) Gravity down to 1.031, damn it stalled, I’ll give it more time since it is still regularly bubbling.

(7/10/11) Gravity down to 1.028, lower but not at the pace I would like.

(7/20/11) Stirred up yeast cake in hopes of restarting fermentation.

(7/27/11) Gravity down to 1.020, still not as low as I would like it, obviously rousing the yeast helped a lot and I should have been doing that from the beginning. Next time I brew a saison I’ll know to do that. I pitched the starter I made three days before using the washed yeast from my porter, California ale yeast, and give it a shaking. Hopefully this will finish it up and I can bottle this weekend.

(8/6/11) Hazaah! Finally down to 1.011 time to bottle. Bottled half with .35 cups of table sugar (2.1 oz) boiled and cooled table sugar. The other half was racked into my 3 gallon carboy with the Pinot Gris soaked Hungarian oak cubes and the dregs from the Russian River Temptation. Now only about 8 more months and the sour version should be ready.

(9/1/11) Tasting notes